Information: In this tutorial, we’ll show you how to install Android CDC driver on your Windows computer. After installing CDC driver, you will be able to connect your android device to the Computer. installation of CDC drivers is must if you want to connect your device in META mode (there is a special mode in MTK chipset that allows you to repair your smartphone IMEI number through various tools)
Compatibility: Windows XP, Windows 7, Windows 8, Windows 8.1 and Windows 10.
Manually Install Android CDC Driver
Step 1: Download the latest version of CDC Driver and extract the ZIP file on your PC.
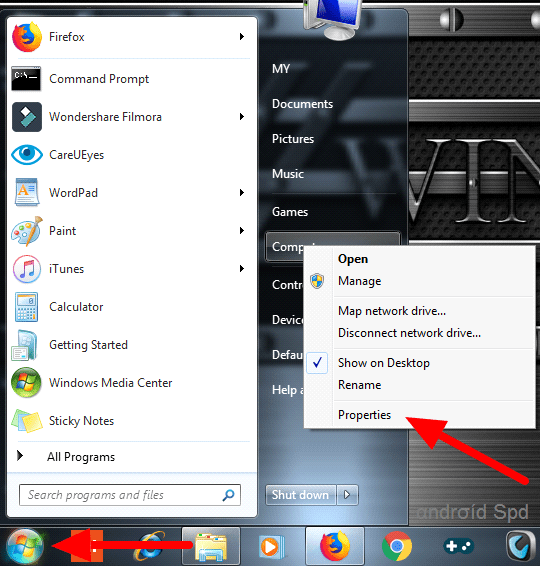
Step 2: Open the Device Manager. (For Windows 7, and XP, click the start button located at the bottom-left corner of the screen and then click computer and select properties.
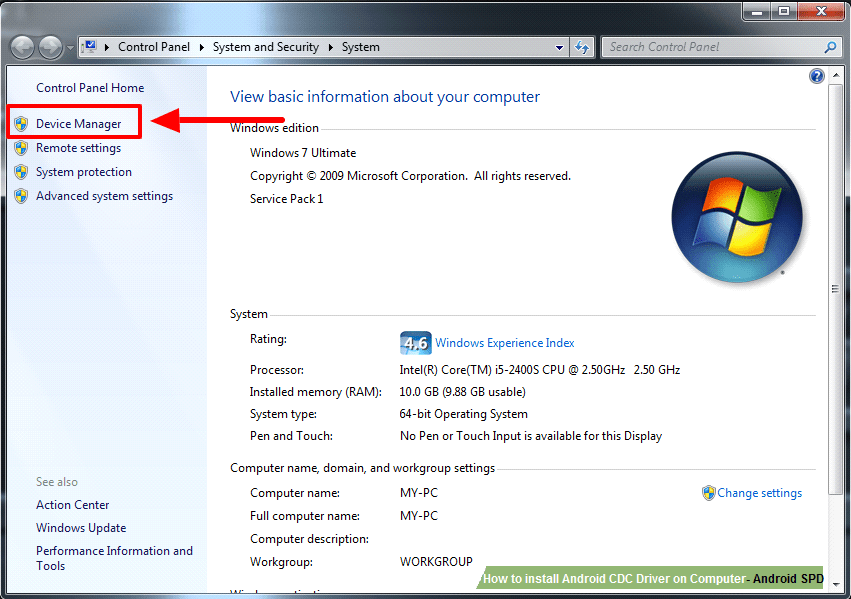
Step 3: Click on the Device Manager. It’s at the top of the screen.
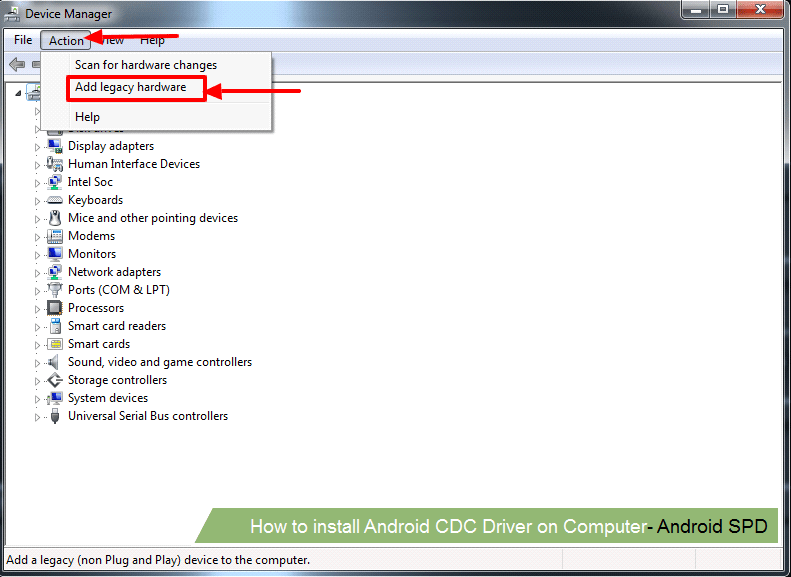
Step 4: Now in device manager click on Action tab and select add legacy hardware from its menu.
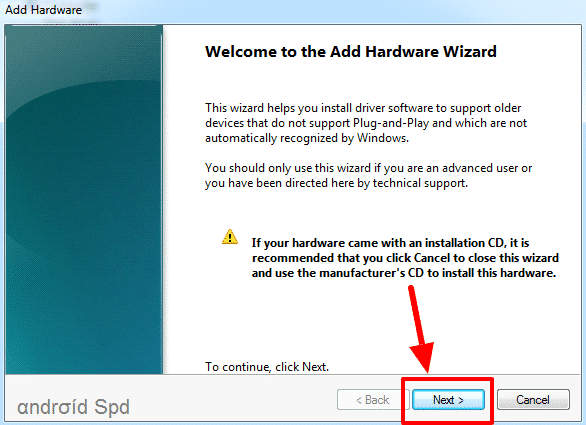
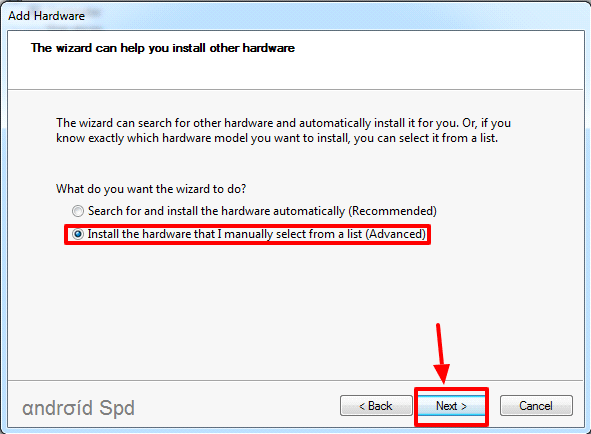
Step 5: Click on the Next button in hardware wizard window.
Step 6: Select install the hardware that I manually select from a list(Advance).
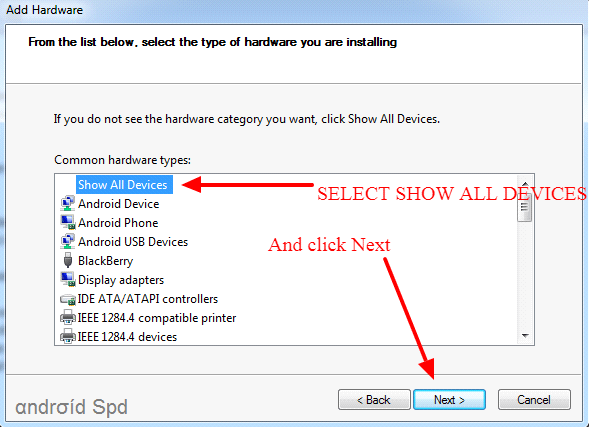
Step 7: Select show all devices and Click on the Next.
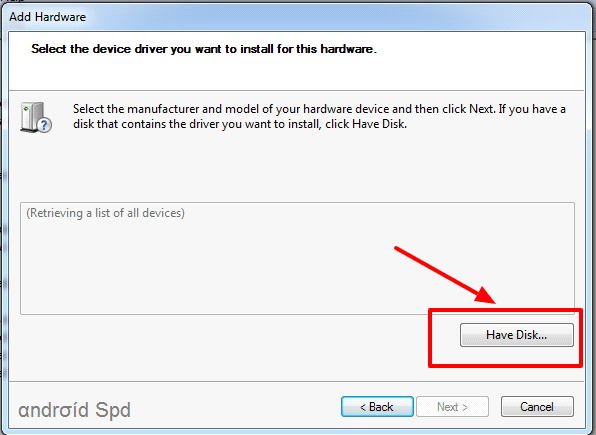
Step 8: Now, Click on Have Disk Button.
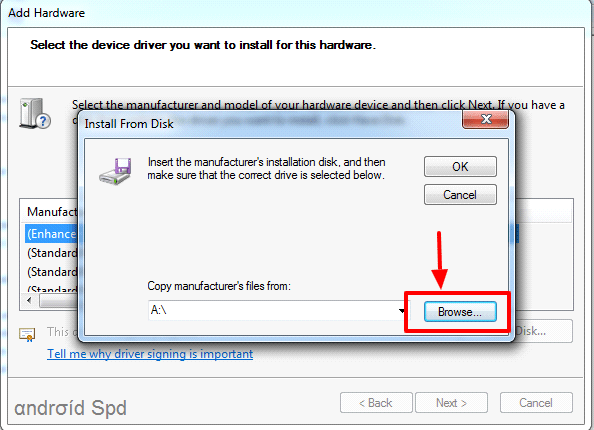
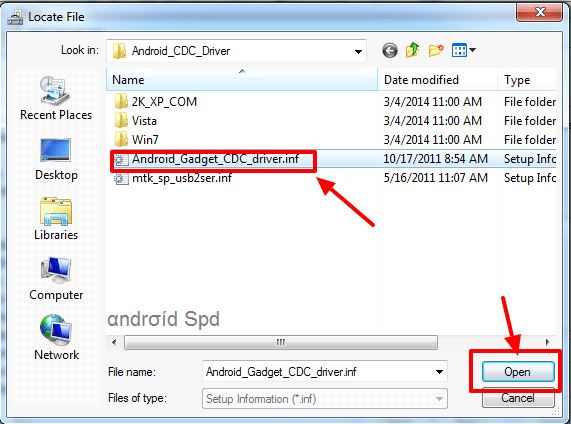
Step 9: Now select browse and locate the folder where you have extracted Android CDC driver and select Android_Gadget_CDC_driver.inf and click open.
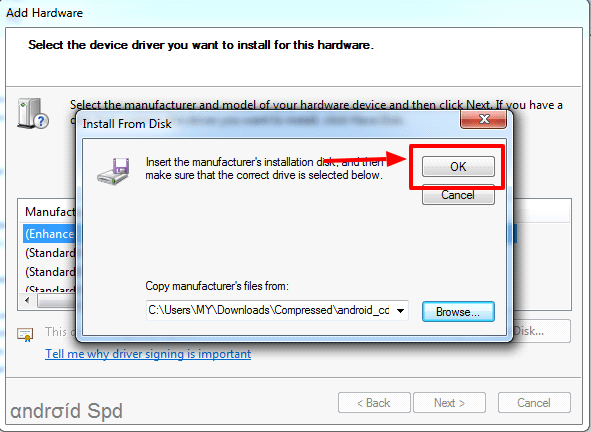
Step 10: Click on OK to continue.
Step 11: Click on Next to continue.
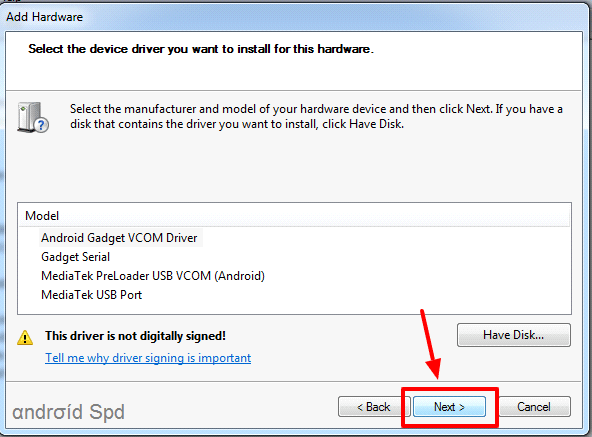
Step 12: Now, click on Next again.

Step 13: Now, Click on Install this driver Software anyway.

Step 14: Now click on Finish to complete adding hardware wizard.
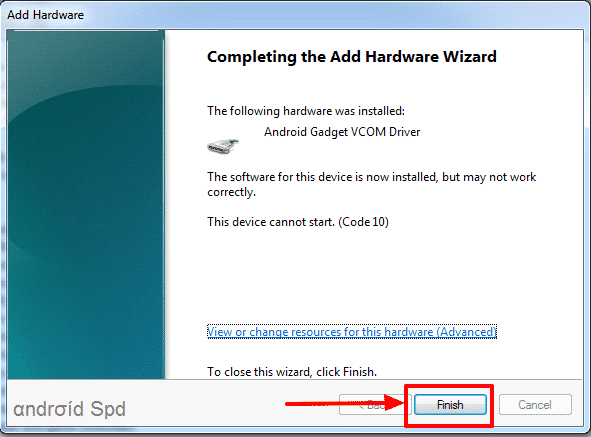
Congratulation you have now successfully installed android CDC drivers manually. You can also follow the same procedure if you want to install manually any drivers.
<